Monday, April 30, 2012

Less-guilt chocolate cake

I love this cake. I am IN love with this cake. Seriously. Love it. It takes 5 minutes to prepare and 30 to bake. No frosting necessary. Oh, and did I mention that it's 100 calories a slice? That's right. Whole wheat flour, sub applesauce for oil and butter, and why not throw in some zucchini. And dark chocolate chips. Yup, it's glorious.

The recipe comes from Yammie's Noshery. Here's what you need:
1/3 cup whole wheat flour
1/3 cup all-purpose flour
3/4 cup brown sugar
1 teaspoon baking soda
3/4 teaspoon baking powder
1/4 teaspoon cinnamon
1/4 teaspoon salt
1/2 cup cocoa powder
2/3 cup applesauce
1 egg, lightly beaten
1 teaspoon vanilla
1 cup shredded zucchini
1/2 cup dark chocolate chips

Preheat oven to 350. Combine all dry ingredients and mix well. Add wet ingredients and mix until just combined. Stir in chocolate chips. Pour into a greased bundt pan and bake for 30 minutes. Yup, that's it. It's that easy. We topped ours with ice cream, but you could also do frosting (if you wanted) or a good dollop of nutella.

Wednesday, April 25, 2012

More baby steps

The front yard is finished!

After we tried out a little grass and a little stone, we felt ready to do the whole thing. And by "we," I really mean Hans with some help from our buddy David.

Check it out!

Before: (According to google maps, apparently when Paul was living with us....)
And after!

And just for kicks, David's truck almost touching the ground with all that sod in the back.

Too bad the backyard is still a mess... that's embarrassing. Baby steps, baby steps.


Wednesday, April 18, 2012

Pantry labels (and download)

As I continue my cleaning and organizing project, the next step was the pantry. It's already pretty organized since I got these OXO containers a few years ago. But I saw this thing on Pinterest with dictionary labels and loved it, so I decided to give it a try. It comes from an Australian blog, The Painted Hive, and she gives a pretty great tutorial on how to do it, as well as some free downloads.

And here they are!


Here's what you need:
inkjet clear waterslide paper (mine from Amazon here)
clear acrylic sealer (This one, but I got it from Michaels)
printer
bowl of water
containers (mine are Oxo Pop)
labels

The original blog posts her labels for download. I had to remake them to fit my containers - I had to make some of them smaller. I also needed some things she hadn't made labels for. So here are mine if you want to use them:
Click to enlarge and save to your desktop. These are 2x2 inch labels

Click to enlarge and save to your desktop. These are 4x3 labels.

Here's what you do:
  1. Once you have the design the way you want it, flip it horizontally so you print the mirror image.
  2. Print the design onto the glossy side of the paper.
  3. Before the ink dries, spray on a decent coat of the sealer 
  4. Cut out the image. Try to cut a nice square because it does show up once the label is on
  5. Fill a little bowl with hot water. Doesn't have to be boiling, but pretty warm.
  6. Immerse one label (only do one at a time!) in the bowl, design up. Keep an eye on it... as soon as you see the transparent film start separating from the backing, pull it out of the water. The hotter the water, the quicker it happens. The instructions I used said 30-45 seconds... that was way too long. The transparent film had already curled on top of itself and it was ruined. In really hot water, it took less than 5 seconds. In warm water maybe 10. I only got 2-3 labels done before the water was too cool for the backing to separate.
  7. Quickly flip the design onto the container and place it where you want. Gently (VERY gently) peel the backing off. You can slide it off, but I found that the ink smeared more that way. Wet your finger and use it to smooth all the air bubbles out.
  8. Leave it to dry for a couple hours (otherwise it'll rub off!)


Tuesday, April 17, 2012

Stone borders

I never knew it took as little as cheap stone to make my husband very happy.

A few posts ago, I talked about making baby steps in the front yard. We took a few more this weekend. Hans has really been wanting to put stones around our trees, but when we looked at them at Home Depot there were pretty pricey - something like $2.50 a stone and we'd need probably 20-25 per tree.

After poking around on the interwebs some, Hans found a stone place in a warehouse section of Austin. Nervously, we headed over there and were pleasantly surprised. It was mostly contractors there, but the employees were really helpful and nice even though we weren't making a huge purchase. The selection is incredible. They have so many different types of stone and in many, many different sizes, colors and styles. You drive your car up on a scale and they weigh it. Then you drive onto the lot and load your car up with whatever stone you want. Then you go back to the scale and re-weigh. It's sold by the ton. We started with a small amount to make sure we'd like it. We got 300 pounds of white stone edgers and it cost us less than $25. If you're in the market, check them out: Austin Custom Stone on Terry-O Lane.

And here's the difference it makes!
Before
After!

Closeup

We're headed back today to pick up more stone for the other two trees. And Hans is already scheming about what he can do with stone in the backyard. Baby steps, baby steps...

Monday, April 16, 2012

Protein breakfast bites

The other day at work, a co-worker looks over and asks me, "Are you eating raw cookie dough for breakfast?"

It sure looks like it. And sometimes I can convince myself it is. But it's not. It's actually these little protein breakfast bites. They are delicious, easy to make, and actually pretty healthy. I don't have any guilt eating three for breakfast and they keep me full well til lunch. You might say I'm addicted.

I found this recipe from Oxygen Women Magazine and then adapted slightly.

Here's what you need:
2/3 cup natural peanut butter (I like the Central Market organic)
1/2 cup honey (local honey helps with allergies - try Goodflow, if you're in Austin! You can eat it by the spoon)
3 Tbsp protein powder
6 Tbsp ground flaxseed
6 Tbsp oats
6 Tbsp dark chocolate chips

Get ground flaxseed, if you can. My food processor chops it up pretty well, but probably not as fine as it could be.

Next time, I'll try to get whey protein powder. The original recipe also recommended chocolate whey protein powder, but this is all I could find at our HEB.
Throw all the ingredients in a bowl (except the chocolate chips) and stir well. It should form a putty-like consistency. Then mix in the chocolate chips. Mmmmm... chocolate chip.

Pinch of a small bunch of dough, and roll it in your palms to form a ball. Repeat 24-28 times :) Refrigerate overnight. Enjoy!

(Check out the oxygen mag link for nutritional details... I added oats, used different protein and my ball-size was a little larger, so my facts may be a bit different).

Monday, April 9, 2012

Easter chicks cupcakes

Hello, Monday.

Hope everyone had a great Easter. Ours was really wonderful. Did you do any baking? My poor kitchen... it took a beating.

But check out the cutie cupcakes it was able to churn out.

Start with whatever cake recipe you'd like. I went with the WASC recipe I've been using so much lately because it seems to be such a hit. That recipe, halved, made three dozen cupcakes. Bake for about 18-20 minutes.

Then assemble your cast of characters. Here's what you need:
Cupcakes
Chocolate chips
Lemon curd
A paring knife
Yellow sanding sugar
About 2.5 cups of buttercream - Most of it will be dyed yellow, but reserve a couple spoonfuls white, and maybe 1/4 cup each of the yellow and orange. Put the 1/4 cup yellow and orange in frosting bags. I used a #1 tip for the orange and... I can't remember for the yellow. Sorry :) Something a little bigger, but it doesn't matter what style. I just put the white in a plastic baggie and barely snipped off the corner to leave a little hole.

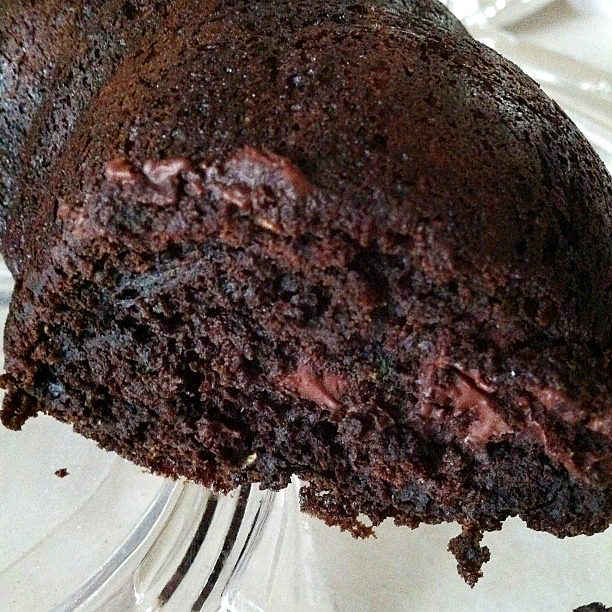
Using a small paring knife, bore out a quarter-sized hole in the middle of each cupcake. I only did half the cupcakes (one of my YW girls can't have citrus) and that little jar of lemon curd perfectly fit 1.5 dozen cupcakes. Buy two jars if you want it in all of them (which you might, because it's DELICIOUS). And what do you do with all those little nuggets you've pulled out? Eat them, of course. Let's not be wasteful.

Next, fill in the holes with lemon curd! I found it was easiest to put the lemon curd in a sandwich baggie and cut off the corner. I tried to spoon the first two and it was just a mess - it left lemon curd on the tops of the cupcakes and I was afraid that would make it harder to ice later.

Smooth yellow icing onto the cupcakes with a knife. Pour the sanding sugar into a shallow bowl. Tip each cupcake upside down into the sugar and twirl it gently to cover the whole top.

Now the fun part! Put two regular-size chocolate chips for eyes. Using the orange icing bag, draw in an upside down triangle for the beak and gently squeeze on the little claws. Using the yellow icing, draw on the wings - I used a motion like I was drawing a sideways heart. Then dot on tiny white spots on the chocolate chips for the eyes. I topped mine off with more sugar on the wings.


Happy Easter!


Oh.... and if you've ever wondered what my kitchen looks like after I'm done baking.....


Oy.

Thursday, April 5, 2012

Hans gets a new toy

I told him he should blog this one, but it was a no-go.

Using gift cards he's been saving up for a while, he finally cashed in and got himself a pretty new miter saw.


Pretty sure our house is about to get a ton of crown molding....

Monday, April 2, 2012

The grass is always greener

Our yard is a mess. Actually, I'm kinda using the word "yard" loosely to describe what we got going on. We inherited a struggling-to-survive mess from the trainwreck of a woman who lived in our house before us. And with the drought last year, we just gave up. In fact, our HOA (who totally have a stick shoved up where the sun don't shine) sent us a notice sometime last summer about how our yard wasn't meeting their standards. It was quickly followed up by a letter to the whole community saying "oh, forget it. You can all let your yards go." And we all did.

Ours has pretty much been a patch of very dry dirt covered in very dead leaves. With all the rain we've had in the past weeks, it's also now got a fair amount of nasty weeds.


The HOA sent a notice to all residents this week that we must re-sod or xeriscape before May 1. That means we have a LOT of work to do.

While I was feeling a bit under the weather this weekend, Hans got to work. He underestimated how much sod we need, so we still need to get some more to fill in the patches. Let's not even talk about the backyard yet.


It's a start, huh? Baby steps, baby steps....